A comprehensive guide to canning
With a printable reference and safety checklist (below)

Home canning is a time-honored way to preserve the bounty of your garden, seasonal fruits, and vegetables, ensuring fresh, flavorful foods all year long. This beginner-friendly guide focuses on safe home canning practices using Bernardin, Canada’s trusted canning brand, and Ball, a leading authority in North American food preservation.
You’ll learn everything from water-bath and pressure canning techniques to choosing the right jars, lids, and equipment. The guide also includes tips on measuring headspace, preparing jars, troubleshooting common problems, and following seasonal canning schedules.
Along the way, we highlight trusted Bernardin and Ball cookbooks, official online resources, and safety checklists, giving Canadian home canners the confidence to preserve food safely, efficiently, and deliciously.
Quick Summary: Understanding the Basics of Safe Home Canning
At its simplest, canning is about creating a vacuum-sealed environment that keeps food safe from spoilage. Food is packed into clean jars, heated to destroy microorganisms that cause decay, and sealed so that air (and anything living in it) can’t get back inside. The heat also drives out air from the jar’s headspace — that gap between the top of the preserves and the lid. As the contents cool, the lid’s sealing compound forms an airtight bond. That vacuum seal keeps the food shelf-stable until the jar is opened.
The safety of home-canned food depends on two main factors: temperature and acidity. Boiling water reaches 212°F (100°C), which is hot enough to kill yeasts, molds, and most bacteria. But some bacteria — specifically Clostridium botulinum — can survive at that temperature. These spores can produce botulism toxin, one of the most dangerous natural poisons known. To prevent this, Ball divides foods into two main categories:
High-acid foods (pH 4.6 or below) — fruits, jams, jellies, pickles, relishes, and properly acidified tomatoes — can be safely processed in a boiling-water canner. The natural or added acid in these foods prevents botulism spores from growing, so boiling is sufficient for preservation.
Low-acid foods (pH above 4.6) — vegetables, meats, poultry, seafood, and most soups — must be processed in a pressure canner, which reaches temperatures around 240°F (116°C). That extra heat is necessary to destroy botulism spores and ensure safety.
There are no shortcuts or safe substitutions between these two methods. A recipe that calls for pressure canning must never be water-bath canned, even for longer times, and acidity levels must not be altered. Home canning is safe when practiced correctly.
Using tested recipes from Ball or other reputable, research-based sources is the single most important rule. These recipes have been lab-tested for heat penetration, jar size, headspace, and acidity to guarantee that each jar reaches a safe temperature for the required time. Adjusting quantities, ingredients, or jar sizes may change how heat moves through the food and compromise safety.
Canning also offers benefits far beyond shelf life. It’s an act of sustainability — reducing food waste, cutting reliance on packaging, and connecting us with older, seasonal rhythms of cooking. When done safely, canning allows home cooks to preserve flavour, culture, and memory in tangible, nourishing form.
Canning Story: From Clay Pots to Canning Jars (A history of fermentation across cultures)
This guide will walk you through each step of the process using only verified Ball guidelines, so you can confidently build your pantry, one jar at a time.
Types of Canning — Which to Use and Why
All safe home canning methods fall into one of two categories: water bath canning and pressure canning. The difference between them isn’t about convenience or preference—it’s about science. The type of canning you choose depends entirely on the food’s acidity and what temperature is required to make it safe for long-term storage. Ball’s research and testing form the foundation of both methods.
Water bath canning is the simpler of the two, and it’s where most beginners start. In this method, filled jars are submerged in boiling water, completely covered by one to two inches, and processed for a specific amount of time. Boiling water reaches 212°F (100°C), which is sufficient to destroy molds, yeasts, and many types of bacteria. However, this temperature is only safe for high-acid foods, where the pH is 4.6 or lower. The acidity in these foods prevents the growth of Clostridium botulinum, the bacteria responsible for botulism, a rare but serious form of food poisoning. Because of that, high-acid foods can be safely canned using this method. These include most fruits, fruit preserves like jams and jellies, pickles, relishes, chutneys, and properly acidified tomatoes. The combination of acid and boiling water creates an environment hostile to dangerous microbes.
Pressure canning is required for low-acid foods—those with a pH above 4.6. This group includes vegetables such as beans, corn, and carrots, as well as meats, poultry, seafood, and soups that contain any of those ingredients. Low-acid foods must be heated to at least 240°F (116°C) to destroy botulism spores. A pressure canner achieves this by trapping steam, which raises the temperature above the boiling point of water. Unlike pressure cookers or electric multi-cookers, a true pressure canner is designed specifically for food preservation and must be used according to both the canner manufacturer’s directions and Ball’s tested processing guidelines.
The distinction between these two methods is absolute: a recipe meant for pressure canning cannot be safely adapted for water bath canning, even with longer processing times, and vice versa. The temperatures achieved during each method are fundamentally different, and safety depends on reaching and maintaining those temperatures for the time proven to destroy microorganisms. The only way to ensure that a jar of food is safe for shelf storage is to follow a tested recipe that specifies the correct method.
There is a third term sometimes confused with canning—steam canning. While Ball recognizes steam canning as a valid method for certain high-acid foods, it should only be used with recipes specifically tested and approved for that purpose, since processing times differ from boiling-water methods. For beginners, Ball recommends starting with traditional water bath or pressure canning to learn the core principles.
In short, the correct method of canning depends on what you’re preserving. High-acid foods are safely processed in a boiling-water canner; low-acid foods require a pressure canner. When in doubt, check the acidity and follow the recipe’s instructions exactly. Safe canning always begins with using the right method for the right food.

Why Acidity Matters
Acidity is the single factor that determines whether a food can be safely preserved in a boiling-water canner or must be processed in a pressure canner. Understanding it isn’t just helpful background knowledge—it’s the foundation of safe canning. Ball’s tested recipes and guidelines are built entirely around this principle.
Every food has a measurable pH value that indicates how acidic or alkaline it is. The pH scale runs from 0 to 14, with lower numbers representing higher acidity. A food with a pH of 4.6 or lower is considered “high acid,” while anything above 4.6 is “low acid.” This number isn’t arbitrary. At pH 4.6 and below, the spores of Clostridium botulinum cannot grow or produce toxin. That is why high-acid foods can be safely processed in boiling water, while low-acid foods must reach the higher temperatures of a pressure canner.
High-acid foods include nearly all fruits and fruit products such as jams, jellies, fruit butters, and pie fillings made with naturally acidic fruits. Vinegar-based pickles, chutneys, and relishes are also high-acid, because the vinegar solution lowers the overall pH. Tomatoes fall near the borderline—they are naturally low-acid, but Ball recipes instruct that bottled lemon juice or citric acid must be added to ensure safety. Even a small shift in pH can change how microorganisms behave in a sealed jar, which is why Ball’s tomato recipes always specify exact acid additions and why they must not be reduced or omitted.
Low-acid foods include vegetables, meats, poultry, fish, seafood, and mixed dishes like chili or soup that contain any low-acid ingredient. Because these foods lack sufficient acidity, harmful bacteria can survive boiling temperatures and grow in the oxygen-free environment of a sealed jar. Only the higher heat of pressure canning—around 240°F (116°C)—destroys these spores and makes the food shelf-stable. For that reason, Ball never approves water bath canning for low-acid foods, no matter how long the jars are boiled.
Altering the acidity of a tested recipe can make a safe product unsafe. Substituting fresh lemon juice for bottled lemon juice, changing the type or concentration of vinegar, or adding low-acid ingredients like garlic, peppers, or onions to a jam or relish can all affect pH. Ball recipes are developed with laboratory testing to ensure that each combination of ingredients reaches the correct level of acidity and heat penetration during processing. This is why Ball advises never to adjust vinegar amounts, substitute ingredients that affect acid balance, or change jar sizes and headspace. Even small variations can alter how heat moves through the jar and result in underprocessing.
For beginners, the simplest way to ensure safety is to follow Ball’s tested recipes exactly. Each one clearly states whether water bath or pressure canning should be used and includes the correct processing times for various altitudes. When a recipe calls for added acid—whether lemon juice, citric acid, or vinegar—it must always be included in the exact quantity specified. Acidity is not a flavour choice; it is a safety requirement.
In short, acidity determines everything about the canning process. High-acid foods can be safely preserved with boiling water. Low-acid foods demand the higher temperature of pressure canning. The dividing line at pH 4.6 is what makes the difference between safe, shelf-stable preserves and spoiled, potentially hazardous food. By respecting that line and following Ball’s tested directions, home canners can confidently preserve food that is both delicious and safe to share.
Canning Story: Preservation as Protest (Canning, Pickling, and Fermenting in Hard Times)
Essential Equipment and Terminology
Canning doesn’t require a complicated setup, but every piece of equipment plays a role in safety and consistency. Ball has spent more than a century testing these tools, and their recommendations form the industry standard for home canning. Using the right equipment—and using it properly—ensures even heating, airtight seals, and jars that stay stable on the shelf.
A canner is the foundation. For high-acid foods, a boiling-water canner is used. This can be a purpose-built canning pot or any deep, flat-bottomed pot with a tight-fitting lid and a rack that keeps jars off the bottom. The pot must be deep enough to cover the tops of the jars by one to two inches of water during processing. For low-acid foods, a pressure canner is required. This is not the same as a pressure cooker. A true pressure canner is a heavy, lidded vessel designed to trap steam and build pressure until the temperature inside reaches about 240°F. That temperature is necessary to destroy botulism spores in low-acid foods. Ball instructs canners to follow both the canner manufacturer’s directions and the tested recipe’s processing times exactly.
The rack inside the canner prevents jars from resting directly on the bottom of the pot, allowing water and steam to circulate evenly. It also keeps jars stable during boiling or pressure changes. Racks come with most canners, but Ball sells replacements and adjustable models for various jar sizes.
Jars and lids are the next essentials. Ball’s glass canning jars are tempered to withstand high heat. Always inspect jars before use—discard any with chips, cracks, or rough rims, as these can prevent sealing or cause breakage. Ball recommends using new lids every time. The sealing compound softens with heat to form an airtight bond during cooling, and it can only be used once. The bands (the screw-on rings) can be reused if they’re not bent or rusted. Jars and bands should be washed in hot, soapy water before use; jars can be kept hot in simmering water to prevent thermal shock when filled.
A few small tools make the process cleaner and safer. A jar lifter grips hot jars securely when lowering them into or lifting them out of the canner. A canning funnel fits inside jar mouths to prevent spills and keep rims clean. A bubble remover—often a simple plastic or wooden stick—helps release trapped air bubbles after filling, which prevents underprocessing and poor seals. A headspace tool measures the gap between food and lid; each tested recipe specifies the correct distance, which affects sealing and vacuum formation. Clean kitchen towels are used to wipe rims and rest jars after processing.
Thermometers and timers are optional but useful. Consistent heat and precise timing are key to success, and Ball’s tested recipes assume you’ll follow them closely. An altitude chart is also important, since processing times or pressures must be adjusted if you live above 1,000 feet.
Each tool in the canning setup has a specific purpose, and leaving one out often means risking a failed batch. Following Ball’s list of recommended equipment ensures that your jars heat evenly, seal properly, and cool safely—no shortcuts, no guesswork. Once you’ve gathered these basics, you have everything needed to start canning confidently and safely.
Preparing Food and Jars
Good canning starts long before the jars go into the canner. Preparation determines both safety and quality, and this is where beginners often discover that canning is as much about rhythm and organization as it is about the recipe itself. Ball’s tested methods lay out every step for a reason: cleanliness, temperature control, and precision all affect whether jars seal correctly and stay safe on the shelf.
Start by setting up a clean, spacious workspace. Wipe down counters, clear away clutter, and wash your hands thoroughly. You’re creating an environment where food will move directly from your stove into sterilized jars that must stay uncontaminated until sealed. If you’re working in batches, it helps to group tasks: prep all produce first, line up your jars and lids, and heat your canner while cooking the recipe.
The quality of your ingredients makes a real difference. Ball recommends using produce at its peak—ripe but not overripe, free of bruises or decay. Imperfect fruit and vegetables can lead to spoilage or off flavours. Wash everything under cool running water and trim away stems, blemishes, and any damaged spots. Do not use soap or detergents on food, and avoid soaking produce for long periods. For meats, poultry, or fish, follow the recipe’s preparation steps exactly, trimming fat or skin if instructed. Each tested recipe is calibrated to specific ingredient weights and cuts.
Next comes preparing the jars. Wash jars, lids, and bands in hot, soapy water and rinse well. Ball no longer requires sterilizing jars before use if they will be processed for at least ten minutes (or longer) in the canner. Instead, the focus is on keeping them clean and hot so they don’t crack when filled with hot food. Place jars in a pot of simmering water (around 180°F) until you’re ready to fill them. Lids should stay at room temperature—Ball no longer recommends preheating or boiling them, as that can damage the sealing compound. Keep bands nearby, clean and dry.
Temperature control is important. Filling hot food into cold jars, or vice versa, can cause glass to break. Ball’s phrase for this is “hot food into hot jars, cold food into cold jars.” Pay attention to the temperature instructions in each recipe—if a recipe directs you to pack hot jam, soup, or relish, the jars should be kept hot until that moment. If you’re canning raw-packed fruit or vegetables, the jars can be at room temperature.
Before filling, check each jar rim carefully by running a finger around it. Even a tiny chip or rough spot can prevent a proper seal. When the food is ready, use a canning funnel to fill jars to the headspace specified in the recipe. That gap, usually between ¼ inch and 1 inch, allows the contents to expand during processing and ensures a good vacuum seal as they cool. After filling, remove any trapped air bubbles with a bubble remover or nonmetal utensil, then wipe the rim with a clean, damp cloth. Place the lid centered on the jar and screw the band on just until fingertip-tight—snug but not forced.
Preparing food and jars is the quiet, careful part of canning. Once everything is clean, hot, and ready, the actual processing step becomes straightforward. This stage builds the foundation for a safe seal and a jar you can trust months from now, when the season’s harvest is long gone.

Filling Jars and Removing Air Bubbles
Filling jars seems simple, but it’s one of the most critical steps for ensuring both food safety and shelf stability. How you pack the food, the amount of liquid you add, and the air left inside the jar all determine whether it seals properly and keeps safely. Ball’s canning guides emphasize precision here—not for perfectionism’s sake, but because every jar must behave predictably under pressure and heat.
Before filling, double-check that your food is at the correct temperature for the recipe. For hot-pack methods, the food and syrup or liquid should be simmering when ladled into hot jars. For raw-pack methods, the food is packed cold into room-temperature jars, and boiling liquid is poured over it. Mixing those methods (for example, hot food into a cool jar) risks broken glass or an unsafe internal temperature after processing.
Place a clean canning funnel over the jar to keep rims clear and to help you measure the correct headspace. Ball’s recipes specify the exact amount of space to leave between the food and the jar rim—commonly ¼ inch for jams and jellies, ½ inch for pickles and tomatoes, and 1 inch for low-acid foods processed in a pressure canner. Headspace matters because the contents expand during heating. Too little space and the food may overflow, preventing a seal; too much space and the air inside may not be fully expelled, leaving oxygen that allows spoilage organisms to grow.
Pack the food evenly, without crushing or forcing it down. For sliced produce, arrange pieces to make efficient use of the space while keeping liquid able to circulate freely. If the recipe calls for covering solids with brine, syrup, or water, pour enough to fully submerge the contents while maintaining the correct headspace. Using a ladle or measuring cup helps control this step neatly.
Once jars are filled, air trapped between pieces of food must be removed. Air pockets not only reduce shelf life but can interfere with heat penetration during processing. To remove bubbles, insert a bubble remover or a thin, nonmetal utensil (a plastic or wooden chopstick works well) along the inside of the jar, then gently move it up and down to release trapped air. Repeat in several spots. After releasing bubbles, recheck the headspace and add more liquid if needed.
When the jar is properly filled, wipe the rim and threads with a clean, damp cloth or paper towel. Even a trace of food or syrup can prevent a lid from sealing properly. Then place the lid squarely on the jar, ensuring the sealing compound rests evenly on the glass. Screw on the metal band just until fingertip-tight—snug, but not forced. Over-tightening prevents air from escaping during processing, which can cause buckled lids or a false seal.
As you fill each jar, keep them warm until all are ready to process. A towel-lined tray works well for holding filled jars while you finish the batch. Avoid letting them sit too long before processing; cooling can cause temperature differences that interfere with sealing.
Filling jars correctly is a mix of accuracy and calm repetition. Each motion—ladling, checking headspace, removing bubbles—creates the conditions for a vacuum seal that lasts safely for a year or more. This is the quiet satisfaction of canning: transforming perishable food into something stable and trustworthy, one careful jar at a time.
Processing Jars — Water-Bath and Pressure Canning
Processing is what makes canning safe. It’s the step that destroys microorganisms and seals the jar so no new bacteria can enter. Without correct processing, a jar may look sealed but still be unsafe to eat. Ball’s methods are built on decades of laboratory testing that match time, temperature, and pressure to the food’s acidity and density. Following those tested times is non-negotiable.
Water-Bath Canning is used for high-acid foods—recipes with a pH of 4.6 or lower. This includes most fruits, jams, jellies, pickles, fruit butters, chutneys, and properly acidified tomatoes. The boiling temperature of water (212°F or 100°C) is high enough to kill molds, yeasts, and many bacteria present in these foods. It also drives air out of the jar, allowing the vacuum seal to form as the jar cools.
To water-bath can, fill the canner halfway with water and begin heating it. The water must cover the tops of the jars by at least one inch during processing. When the filled jars are ready, use a jar lifter to lower them onto the rack inside the canner. Add more hot water if necessary to maintain that coverage. Once all jars are in, bring the water to a full rolling boil. Start timing only after the water reaches a continuous boil. Maintain that boil for the entire processing time indicated in your Ball recipe, adjusting for altitude if needed (higher elevations require longer times because water boils at a lower temperature). When time is up, turn off the heat, remove the lid, and let the jars rest in the hot water for five minutes before lifting them out. This short rest prevents temperature shock and helps contents settle.
Pressure Canning is required for low-acid foods—vegetables, meats, poultry, seafood, and combination recipes such as soups or chili. These foods can support the growth of Clostridium botulinum spores, which cause botulism. Boiling water isn’t hot enough to destroy those spores, but pressurized steam reaches at least 240°F (116°C), which is sufficient. Only a tested pressure canning process can guarantee that level of safety.
Ball recognizes two main types of pressure canners: dial-gauge and weighted-gauge. Both are large, heavy pots fitted with a locking lid, vent pipe, and rack. Fill the canner with the amount of water specified in the manufacturer’s directions—usually 2 to 3 inches. After loading filled jars, secure the lid and heat the canner until steam escapes steadily through the vent. Vent the steam for 10 minutes before placing the weight or closing the petcock; this step forces out trapped air so the interior reaches a true temperature-pressure relationship. Then allow pressure to rise to the level indicated in the recipe, typically 10 to 15 pounds depending on altitude and canner type. Adjust the heat to maintain steady pressure and begin timing once the correct pressure is reached. Never leave a pressure canner unattended. When processing time ends, turn off the heat and let pressure return to zero naturally. Do not force-cool or open the canner early—this can cause liquid loss or seal failure. Only remove the lid when pressure has fully dropped, then let jars rest inside the open canner for about ten minutes before removing them.
Whether using water-bath or pressure methods, accuracy and patience are essential. Every minute and degree has been tested to ensure a margin of safety. When jars finally emerge, steaming and sealed, that’s the visible proof of careful work—the heat and time that make shelf-stable food truly safe.
Cooling, Checking Seals, and Storing Jars
Once jars have been processed, the work isn’t quite finished. The cooling and sealing stage is where the vacuum forms—the invisible step that makes your preserved food shelf-stable. Handling jars properly during this phase ensures that seals set correctly and remain secure for long-term storage. Rushing this part can undo even perfect processing.
After removing jars from the canner, lift them straight up with a jar lifter and place them on a towel-lined counter or wooden board. Keep jars upright and avoid tilting or turning them. The contents inside are still boiling hot, and the lids need time to seal as the temperature drops. Never attempt to tighten the bands or press on the lids at this point; the seal forms naturally as cooling air contracts inside the jar. Leave at least one inch of space between jars for even air circulation.
Cooling should happen at room temperature, away from drafts, direct sunlight, or cold surfaces. Sudden temperature changes can cause jar breakage or siphoning, where liquid is forced out of the jar. Ball recommends letting jars rest undisturbed for 12 to 24 hours. During this time, you’ll often hear a satisfying popping sound as lids seal—each pop means a successful vacuum has formed. However, not all jars will make noise, so silence doesn’t mean failure.
Once jars have cooled completely, it’s time to check the seals. Remove the screw bands and inspect each lid visually. The center of a properly sealed lid should be concave and not flex when pressed. If the lid clicks up and down, it hasn’t sealed and the jar must be refrigerated and used within a few days. Another way to confirm the seal is to gently lift the jar by the edges of the lid (without the band). If it holds firmly, the vacuum is strong. Never reprocess jars just to achieve a seal unless the Ball recipe specifically allows it and the food has not cooled for more than 24 hours.
When seals are confirmed, wash the jars to remove any residue from processing. Even small traces of syrup or brine can attract mold or rust under the band. Dry jars thoroughly before labeling. Ball recommends writing the contents and processing date directly on the lid with a permanent marker or applying adhesive labels. Bands should be stored separately; leaving them on can trap moisture and cause rust or false seals over time.
Store jars in a cool, dark, and dry place—ideally between 50°F and 70°F. Avoid direct sunlight, high humidity, or fluctuating temperatures such as near stoves or in uninsulated garages. Light and heat can fade colors and degrade flavour. Properly sealed jars typically keep their best quality for up to one year, though many remain safe beyond that if seals stay intact. Always inspect before opening: look for bulging lids, leaking, off smells, or mold. When in doubt, discard the contents without tasting.
This final stage is quiet but crucial. A successful seal is both chemistry and trust—the proof that heat, time, and care have come together exactly as intended. When you label and shelve your jars, you’re not just storing food; you’re preserving a moment in the season’s rhythm, safely captured for another day.
Common Canning Mistakes and How to Avoid Them
Even experienced home canners slip into habits that compromise safety or quality. Many online “tips” can seem harmless but actually create serious risks, especially when they diverge from tested Ball or USDA methods. Understanding why these mistakes matter helps you make confident, informed choices each time you can.
1. Using untested recipes.
The most serious error is canning from unverified sources—family hand-me-downs, social media, or older cookbooks printed before modern safety research. Only use recipes from current editions of The Ball Blue Book, Ball Complete Book of Home Preserving, or the USDA Complete Guide to Home Canning. These sources have been laboratory-tested to ensure that the time, temperature, and acidity reach levels proven to prevent botulism and spoilage. A delicious but unsafe recipe is never worth the risk.
2. Guessing at processing times.
Processing times are precise for a reason. They account for jar size, food density, temperature, and altitude. Undercooking can leave bacteria alive inside sealed jars. Overprocessing can degrade texture and flavour. Always start timing when the canner reaches full rolling boil (for water-bath) or the correct pressure (for pressure canning), and never “round down.” Adjust for altitude according to Ball’s charts—water-bath times lengthen, and pressure increases with elevation.
3. Using a pressure cooker instead of a pressure canner.
The two are not interchangeable. Pressure cookers are smaller and heat unevenly, with no way to regulate or monitor internal pressure accurately over time. Only a true pressure canner—designed for canning, with a gauge or weighted regulator—can maintain the consistent pressure needed to destroy Clostridium botulinum spores. Using a pressure cooker may produce jars that appear sealed but are unsafe inside.
4. Improper headspace.
Too little headspace causes food to bubble up and interfere with the seal; too much prevents air from being fully expelled, leaving oxygen that allows spoilage. Follow the headspace exactly as stated in the recipe. Use a measuring tool or the markings on a Ball bubble remover wand. If you lose liquid during processing, don’t open jars to top them off—check that seals are sound and simply store those jars near the front to use first.
5. Reusing lids.
Metal canning lids are single-use. Once the sealing compound has been compressed and heated, it won’t reliably reseal. Bands, jars, and accessories can be reused indefinitely if undamaged, but always start with new lids. Wash and inspect them before use to ensure the sealing compound is smooth and unbroken.
6. Tightening bands too much.
Overtightened bands prevent air from escaping during processing, which can lead to buckled lids or failed seals. “Fingertip-tight” is the right measure—tighten until you meet resistance, then stop. The escaping steam during processing is what creates the vacuum seal as the jar cools.
7. Testing seals too early.
Pressing lids or tightening bands while jars are still warm interrupts the sealing process. Let jars rest for 12–24 hours before testing. Patience here is safer than tinkering.
8. Storing jars with bands on.
It’s tempting to leave bands in place, but moisture can collect under them and cause rust or a false sense of security if a lid loosens later. Store jars without bands in a cool, dark location and reattach them only when gifting. If you really want to store them with rings, just put the rings on loosely after the jars are dried.
Avoiding these mistakes is mostly about respecting tested processes. Safe canning doesn’t depend on intuition or tradition—it depends on chemistry, verified research, and a clean workspace. Every correct jar is proof that you’ve balanced time, heat, and care exactly as the science intended.
Complete Home Canning Safety and Preparation Checklist
1. Planning and Recipes
- Use only tested recipes from Bernardin or Ball.
- Plan seasonal preserves using fresh, ripe ingredients.
- Determine the correct canning method (water-bath for high-acid, pressure for low-acid).
- Check ingredient quantities and processing times in advance.
2. Equipment and Jars
- Inspect jars for cracks, chips, or defects.
- Use new lids and undamaged bands.
- Select jar sizes appropriate for the recipe.
- Ensure water-bath or pressure canner is clean and functioning properly.
- Have jar lifter, funnel, bubble remover, and towels ready.
3. Preparing Jars and Food
- Wash jars, lids, and utensils in hot, soapy water.
- Preheat jars as recommended.
- Leave proper headspace according to the recipe.
- Remove air bubbles before sealing.
- Wipe rims clean before placing lids.
4. Processing
- Use water-bath canner for high-acid foods.
- Use pressure canner for low-acid foods.
- Process jars for the exact time specified in the recipe.
- Maintain proper water level and temperature.
- Avoid over-tightening bands; fingertip-tight is sufficient.
5. Cooling and Sealing
- Cool jars upright, undisturbed, for 12–24 hours.
- Check seals by pressing the center of each lid.
- Remove bands after jars are cooled to prevent rust.
- Reprocess or refrigerate jars that did not seal properly.
6. Storage
- Label jars with contents and date.
- Store in a cool, dry, dark place.
- Keep an inventory to track expiration or use dates.
7. Troubleshooting
- Discard jars with bulging lids, leaks, mold, or off odors.
- Check recipes and headspace if liquid loss occurs.
- Use filtered water if liquids appear cloudy.
- Follow tested processing times carefully to prevent fermentation.
8. Safety Reminders
- Never use old, non-canning jars for heat processing.
- Avoid improvising acidity or ingredients in recipes.
- Always follow Ball or Bernardin recommended procedures.
- Educate all household members on safe canning practices.
Troubleshooting Common Problems
Even careful canners encounter issues, especially when trying new recipes or working with unfamiliar equipment. Understanding why a problem occurs—and how to correct it—can save time, prevent wasted food, and, most importantly, maintain safety. Ball Canning provide tested solutions to common challenges.
1. Lids Won’t Seal
One of the most frequent problems is a jar that looks finished but doesn’t seal. Causes include food on the rim, improper headspace, over-tightened bands, or damaged lids. To fix this, first inspect the rim for residue and wipe it clean. If the headspace is incorrect, you may remove the lid, adjust the contents, and reprocess the jar while it is still hot and clean, following the original recipe.
Once jars have fully cooled, do not reprocess them—refrigerate the food or reheat and reprocess from the start within 24 hours. Do not attempt to reprocess a jar after it has cooled for more than 24 hours. A failed lid can also be replaced with a new, unused lid and reprocessed. Always follow the tested reprocessing instructions in the Ball guide.
2. Liquid Loss During Processing
Siphoning or loss of liquid from jars often occurs when headspace is too small, jars are not hot, or the temperature in the canner fluctuates. To reduce liquid loss, maintain steady heat during processing, preheat jars and food as required, and leave the recommended headspace. Small amounts of liquid loss are normal; jars should be inspected after cooling. If liquid is below the food surface, check seals carefully and use the contents promptly or refrigerate.
3. Cloudy or Discolored Liquids
Cloudy syrup or brine can result from minerals in water, overripe produce, or reactions with metal utensils. While minor cloudiness is usually safe, always inspect for other signs of spoilage—off smells, mold, or gas bubbles. Using filtered water and high-quality produce reduces the likelihood of discoloration. Avoid using aluminum utensils or scrapers that may react with acidic foods.
4. Mold Growth in Jars
Mold appears when lids are improperly sealed or jars are stored in warm, damp environments. Once mold develops, the contents are unsafe to eat. Prevent mold by ensuring jars are sealed, storing in cool, dry conditions, and keeping bands off during storage. Any jars with mold should be discarded.
5. Broken or Cracked Jars
Glass jars can crack due to temperature shock, over-tightened bands, or stacking improperly in the canner. Always preheat jars as recommended and avoid placing them directly on cold surfaces after processing. Use a canner rack, maintain water levels, and never overfill the canner.
Cracked jars should be discarded. Do not consume the contents unless you are certain no glass fragments entered the food. If the food appears uncontaminated, it may be transferred to a clean container and refrigerated for immediate use.
6. Off Flavours or Fermentation
Unexpected sourness or gas bubbles indicate fermentation after processing, often due to underprocessing or using untested recipes. Never taste or eat suspect food. Correct this by strictly following tested processing times, headspace requirements, and acidity adjustments.
By recognizing the root cause of problems, home canners can prevent them in future batches. Consistency—using tested recipes, proper headspace, correct processing times, and careful handling—is the most reliable way to avoid errors. Each jar is a balance of temperature, time, and cleanliness; understanding these relationships makes troubleshooting easier and preserves both quality and safety.
Seasonal Canning Guide
Canning is inherently tied to the rhythm of the seasons. Fresh, in-season produce not only tastes better but also preserves more successfully, as it contains higher levels of natural sugars, acids, and water content at peak ripeness. A seasonal approach helps plan both what to can and when, making your kitchen workflow more predictable and your results more consistent.
Spring (March–May)
Spring is a time for early greens and cool-weather crops. Rhubarb is naturally acidic and suitable for jams, sauces, and syrups. Asparagus and spinach are low-acid vegetables and cannot be safely water-bath canned unless pickled using a tested acidified recipe. Because rhubarb is highly acidic, making it suitable for water-bath canning in jams and sauces.
Pickled vegetables like spring onions, radishes, and early carrots are excellent candidates. Many Ball recipes for spring canning rely on high-acid or acidified methods, which are safer during this period when tender vegetables dominate.
Summer (June–August)
Summer offers the widest variety of canning options, from fruits to vegetables.
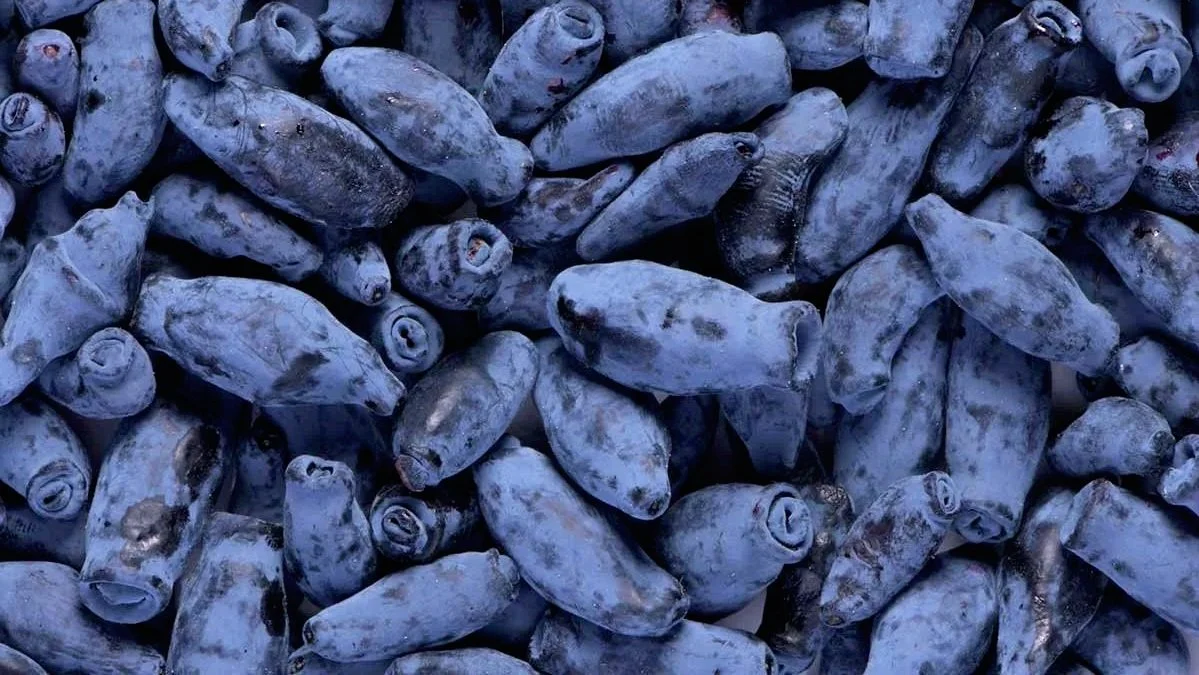
Tomatoes, berries, peaches, zucchini, and beans reach peak quality. High-acid fruits such as strawberries, blueberries, and cherries are ideal for jams, jellies, and pie fillings.
Tomatoes require careful acidity adjustments—either using tested acidification recipes or processing them in a pressure canner when combined with low-acid ingredients. Summer is also prime time for pickles, salsas, and chutneys, as the abundance of cucumbers, peppers, and herbs allows for experimentation with flavour profiles while following tested Ball procedures.
Fall (September–November)
Fall focuses on storage crops and robust vegetables. Apples, pears, pumpkins, and winter squash dominate. Apple butters and pear preserves are ideal for water-bath canning when acidity is maintained. Pumpkin and winter squash, however, should only be canned in cubes—never puréed—as home canners cannot ensure safe heat penetration in thick purées. Puréed versions should be frozen instead.
Root vegetables such as carrots, beets, and potatoes are better suited for pressure canning. Fall is also a key time for preserving tomatoes before the first frost, as late-season tomatoes are dense and flavourful. Ball guidelines provide tested times and pressures for these heartier crops, ensuring safety even with lower water content and denser textures.
Winter (December–February)
Winter canning is limited but not impossible. Cold storage vegetables like stored squash or root crops can still be canned in pressure cookers for soups and stews. Fruit preserves may also be made from frozen berries or fruit stored in a controlled environment, following water-bath recipes. Winter is ideal for reviewing canning supplies, checking jars and lids, and planning your upcoming seasonal workflow.
Practical Tips Across Seasons
Always prioritize fruit and vegetables that are firm, ripe, and free from bruises or mold.
Follow tested Ball recipes for each produce type and avoid improvising acidity levels, as this can compromise safety.
Plan your canning batches according to the season’s abundance to minimize waste and maximize shelf-stable storage.
Maintain a calendar noting processing times, yields, and storage location to track seasonal success.
By aligning your canning schedule with the natural harvest cycles, you can preserve peak-quality produce safely and efficiently. Seasonal planning is not only practical but also ensures that each jar maintains the flavour, color, and nutritional value intended by the tested recipes. This approach reduces spoilage, simplifies workflow, and keeps your pantry stocked with a variety of home-preserved foods year-round.
Choosing the Right Equipment for Canning
Having the proper equipment is essential for safe, effective home canning. Using jars, lids, canners, and tools that meet tested standards ensures your preserved foods remain shelf-stable and free from contamination. While many home cooks may try improvised tools, only equipment designed for canning—tested and approved by Ball or Bernardin—can reliably handle the heat, pressure, and vacuum needed to preserve food safely.
Jars
The most important piece of equipment is the jar itself. Ball and Bernardin jars are made from heat-resistant glass designed specifically for canning. They come in multiple sizes: half-pint, pint, and quart are most common. Choosing the right jar depends on your recipe and intended use. Smaller jars are ideal for jams, jellies, and condiments, while larger jars work well for soups, salsas, and tomatoes. Always inspect jars for chips, cracks, or imperfections in the rim; damaged jars can compromise the seal and are unsafe for canning. Avoid using old or recycled jars not intended for canning, as they may break under heat or fail to seal.
Lids and Bands
Lids are single-use components that create the vacuum seal. Ball and Bernardin offer lids with a specially formulated sealing compound that melts during processing and contracts as it cools. Bands are reusable but should be free from rust or bends. Always use new lids for each batch, tighten bands fingertip-tight only, and remove bands after jars have cooled to prevent rust and false seals.
Water-Bath and Pressure Canners
The choice of canner depends on the acidity of the food. High-acid foods, such as fruits, pickles, and jams, can be processed in a water-bath canner. Water-bath canners are essentially large pots with a rack to keep jars off the bottom and enough water to fully submerge jars. Low-acid foods, such as vegetables, meats, or soups, require a pressure canner, which reaches higher temperatures under controlled pressure to destroy harmful bacteria, including Clostridium botulinum. Pressure cookers are not interchangeable with pressure canners; only a tested, certified pressure canner should be used for low-acid foods.
Tools and Accessories
Other tools make the process safer and more efficient. A jar lifter is essential for removing hot jars without touching them. A wide-mouth funnel simplifies filling, reducing spills and maintaining clean rims. Bubble removers or plastic utensils help release trapped air bubbles without damaging jars. Thermometers, timers, and canning racks ensure that processing times and temperatures meet tested standards.
Additional Considerations
Consistency is key. Stick with equipment brands tested for home canning, such as Ball or Bernardin, to avoid unpredictable results. Keep spare lids, bands, and replacement parts on hand for busy canning seasons. Organize your workspace so all tools are within reach and can be sanitized quickly. Following equipment guidelines is not optional; using proper jars, lids, and canners is critical to achieving safe, long-lasting preserves.
By selecting the right equipment and using it correctly, home canners set themselves up for success. Every jar processed with tested tools and techniques combines safety, quality, and longevity, whether you’re making a small batch of strawberry jam or preserving an entire season’s harvest of tomatoes.
Essential Canning Guides for Canadian Home Preservers
1. Bernardin Complete Book of Home Preserving
Authors: Judi Kingry & Lauren Devine
Publisher: Robert Rose
ISBN-13: 978-0778801375
Overview: This comprehensive guide offers over 400 recipes, including jams, jellies, salsas, and low-sugar options. It emphasizes safe canning practices and includes sections on fermentation and freezer preserves.
Why It’s Recommended: As Canada's official home canning resource, it provides region-specific guidance and recipes tailored to Canadian ingredients and preferences.
Where to Find It: Available on Bernardin's official website and major retailers.
2. The All New Ball Book of Canning and Preserving
Publisher: Oxmoor House
ISBN-13: 978-0848746780
Overview: Featuring over 350 recipes, this book offers modern canning techniques and a variety of recipes, including international flavors and creative twists on classics.
Why It’s Recommended: While U.S.-based, it complements Canadian guides with its innovative approaches and extensive recipe collection.
3. Ball® Blue Book Guide to Preserving (38th Edition)
Publisher: Ball
ISBN-13: 978-0972753708
Overview: A staple in the canning community, this book provides step-by-step instructions for canning, pickling, freezing, and dehydrating, with over 500 recipes.
Why It’s Recommended: Its detailed instructions and troubleshooting tips make it a valuable resource for both beginners and experienced canners.
Online Resources for Canners
Bernardin Official Website: Offers a wealth of information, including recipes, canning tips, and product details.
Health Canada – Home Canning: Provides guidelines and safety information for home canning in Canada.
Ball® Canning – Official Website: Features a variety of resources, including recipes and instructional videos.